
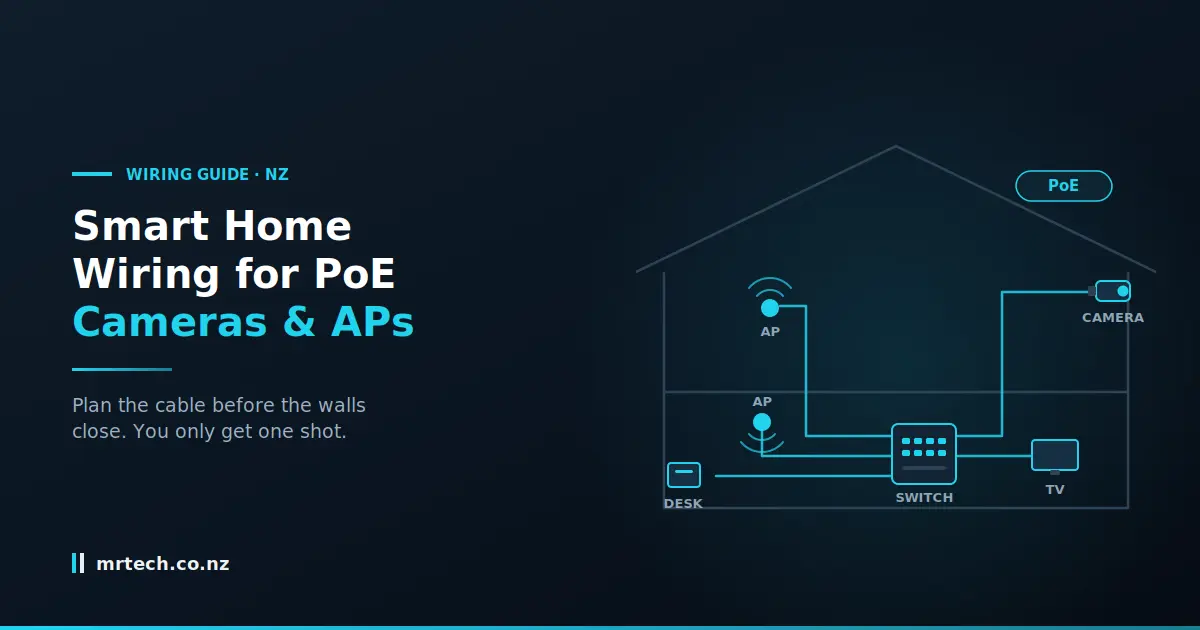
There’s a week in every build where the framing is up, the wiring is exposed, and nothing has been lined yet. During that week, running an extra cable costs a few dollars a metre and twenty minutes.
The week after, it costs a re-line.
That’s the whole reason smart home wiring is worth planning properly rather than sorting out later. Get the cable in the walls now and you can change your mind about switches, cameras and access points for the next fifteen years. Miss it, and you’re choosing between mesh Wi-Fi compromises and cutting holes in new GIB.
NZ Smart Home Wiring Guide
The rule that decides everything: pull more than you need
Cable is the cheapest component in the whole system and by far the most expensive to add later. So run more drops than your device list justifies, run them to places you’re not sure about, and run two cables where you’d run one. Nobody has ever regretted this.
The maths is blunt. An extra 30m run costs you the cable and a bit of labour while the walls are open. The same run after lining means access holes, patching, repainting, and a tradesperson’s callout if it’s even possible.
Two cables to every AP and camera position
Make it standard. Two cables to every ceiling AP location, every camera position, every TV wall.
Why it pays off:
- Redundancy. Cables get nicked by a screw or crushed by a fixing. A spare in the same cavity turns a disaster into a patch-panel change.
- Change of purpose. Today’s camera position becomes tomorrow’s outdoor AP, doorbell or sensor hub.
- Higher PoE tiers. Some devices draw more than a single run comfortably supports over distance.
Conduit and draw strings where cable can’t go
For the runs you genuinely can’t predict a future sleepout, a gate camera, an EV charger position put in conduit with a draw string rather than guessing at cable.
Conduit is cheap while the trenches are open and the walls are exposed. It converts an impossible future job into an easy one
Start with the ONT, not the cupboard
In New Zealand your fibre termination point and ONT position are decided during the UFB install, and your comms cupboard needs to be planned around that. Design the cupboard first and you can find the fibre lands at the opposite end of the house which means either a long internal run or a compromised layout.
This is the single most common planning mistake in NZ builds, and it’s entirely avoidable.
Talking to your installer before pre-line
Raise it early, while the plan can still change. Worth asking:
- Where is the external termination point likely to go?
- Where can the ONT be mounted internally?
- What’s the maximum distance from that point to where I want my cupboard?
- Can the fibre lead-in be routed to suit my preferred location?
Sizing and siting the comms cupboard
Whatever space you’re picturing, add a third. Between the ONT, router, switch, patch panel, a UPS and the loops of patch lead nobody accounts for, cupboards fill fast.
What it needs:
- Depth. At least 450mm to let patch leads bend without strain.
- Ventilation. A PoE switch under load makes real heat. A sealed cupboard in a NZ summer cooks equipment.
- Power. Two or three outlets, installed by your electrician while they’re on site.
- Accessibility. You’ll be in here more than you expect.
A hallway or bedroom wardrobe usually beats the garage more temperate, less dust, closer to the middle of the house.
Choosing cable: Cat6, Cat6A or fibre
Cat6 handles gigabit and PoE perfectly well and is fine for most runs. Cat6A is what you want if you’re pulling cable once and never touching it again, because it carries 10 gigabit the full distance. Fibre belongs between buildings, not inside walls.
| Cat5e | Cat6 | Cat6A | Fibre (OM3/OS2) | |
|---|---|---|---|---|
| Everyday speed | 1Gb | 1Gb / 2.5Gb | 1Gb / 2.5Gb / 10Gb | 10Gb+ |
| 10Gb distance | Not rated | ~55m | 100m | Well beyond 100m |
| PoE support | af/at | af/at/bt | af/at/bt, runs cooler | None — needs separate power |
| Relative cost | Lowest | Low | Moderate | Higher, plus termination |
| Thickness in walls | Thin | Moderate | Thicker, larger bend radius | Thin but fragile |
| Best for | Existing homes only | Budget-conscious new builds | Anything you’re pulling once | Between buildings, sleepouts, long runs |
For a new build, Cat6A is the defensible choice. The price difference across a whole house is real but modest against the build cost, and it removes the cable from the equation for the life of the house. Just tell your installer early it’s thicker and needs a wider bend radius, which affects how tight the corners can be.
Why Wi-Fi 7 APs changed the answer
Access points used to have gigabit uplinks, so gigabit cabling was fine. Current models don’t. A Wi-Fi 7 AP like the U7-Pro has a 2.5GbE uplink because its radios can genuinely exceed a gigabit.
That flips the old logic. The cable is now the constraint, not the radio and cable is the part you can’t swap out.
The 100m rule and how NZ homes hit it
Ethernet’s limit is a 100m channel: roughly 90m of fixed cable in the walls plus patch leads at each end. Inside a typical house you’ll never get close.
You’ll hit it on:
- Long driveways to a gate camera
- Detached garages and workshops
- Sleepouts and granny flats
- Lifestyle blocks generally
Past that, you need fibre with media conversion, an outdoor wireless bridge, or a second switch positioned partway. Plan for it now rather than discovering it when the cable comes up short
Planning your PoE budget before you buy a switch
PoE has two separate limits, and buyers routinely blow the second one. There’s a per-port maximum set by the standard, and a total power budget shared across the whole switch. An eight-port PoE switch rarely powers eight demanding devices.
| Standard | Common name | Power at the port | Typically powers |
|---|---|---|---|
| 802.3af | PoE | ~15.4W | Older APs, basic cameras, VoIP phones |
| 802.3at | PoE+ | ~30W | Most current APs, PTZ and 4K cameras |
| 802.3bt | PoE++ | ~60W or ~100W | Multi-radio APs, heated camera housings, door controllers, displays |
Adding up your real load
Take a US-8-60W as the example. Four 802.3af ports and a 60W total budget a genuinely useful switch, and one that’s easy to over-commit.
Four access points at roughly 15W each: that’s 60W. You’re at the ceiling with nothing left. Add a camera and something stops working, usually intermittently and usually at the worst time.
Now the same exercise on a USW-16-POE: more ports, PoE+ on eight of them, and a total budget that comfortably carries a mixed household of cameras and APs.
Leave 30% headroom
Whatever your total comes to, buy for 130% of it. Devices get added. Standards move up. The AP you replace in three years will draw more than the one it replaced.
Headroom is the difference between adding a camera and replacing a switch
Where the drops actually go
Work device by device rather than room by room, then check the list against your floor plan. The positions people forget are almost always the ones added later at four times the cost.
Access points
Ceiling-mounted, centrally located, one per floor as a starting point. Not in the comms cupboard, not in a corner, not behind the TV.
For a two-storey home, an AP roughly central on each floor covers most layouts. Add one for an outdoor area or a detached space rather than expecting an internal AP to reach through cladding.
PoE cameras
Cover the approach, not just the door. A camera pointed at your front door captures someone’s back after they’ve already arrived; one covering the path captures them walking up.
Practical placement notes:
- Mount at 2.5–3m — high enough to be out of reach, low enough to capture faces
- Avoid pointing into the afternoon sun; backlighting turns a person into a silhouette
- Under eaves where possible for weather protection and a tidier install
- Think about what’s behind the subject, not just the subject
The drops people wish they’d run
- Behind every TV — two, not one
- Every desk position, including the one that becomes an office later
- The garage, for a camera, an AP or a future charger
- An outdoor AP position for the deck
- The driveway or gate
- A ceiling position in the living area even if you’re not sure yet
The NZ-specific details that catch people out
Four local constraints that overseas wiring guides don’t cover: separation from mains cabling, who’s legally allowed to do the work, penetrations through cladding on a new build, and privacy obligations once a camera sees past your boundary.
Separation from mains cabling
Data cable and 230V wiring can’t simply share a cavity. There are separation requirements, and running a data cable alongside mains also invites interference on top of the safety issue.
Your electrician will know the current rules. Ask them to sight your data routes while they’re planning theirs — it takes them a minute and saves an argument at inspection.
Who can legally do the work
Low-voltage data cabling is a different category from electrical work. Anything that touches mains the outlets in your comms cupboard, for instance needs a registered electrician.
Cladding penetrations and weathertightness
Every external camera means a hole through your cladding. On a new build, have the builder do it while they’re on site and responsible for the weathertightness of the envelope.
A DIY penetration through new cladding is a fast way to complicate a claim later. It’s a five-minute job for someone already working on the exterior.
Cameras and the Privacy Act 2020
If your camera captures identifiable people beyond your boundary the footpath, a neighbour’s yard, their windows you’re collecting information about people who haven’t agreed to it.
There’s an exemption for genuinely personal and household use, but it isn’t unlimited, and cameras aimed at neighbouring property have been the subject of complaints. Angle cameras to cover your own land, use privacy masking where your gear supports it, and have a straight conversation with the neighbours before you mount anything pointing their way
Building in room to grow
Future expansion is mostly about leaving space: spare ports on the switch, spare capacity in the conduit, an uplink path you can upgrade, and physical room in the cupboard. Every one of those is nearly free at planning stage.
Uplinks and SFP+
If a second switch is even possible a garage, an office, a sleepout run the cable for it now and choose switches with SFP or SFP+ ports so the link between them can be upgraded to fibre without touching the walls.
Retrofitting when the house is already lined
Not everyone gets the pre-line window. Realistic options for an existing home, roughly in order of preference:
- Ceiling and roof voids — usually the easiest path in a NZ home, particularly single-storey
- Under-floor — good on piles, awkward on a slab
- Surface conduit or trunking — unglamorous, effective, reversible
- Ethernet extenders — reuse existing cable runs where pulling new is impractical
- Wireless bridge — the sane answer for a detached building across a yard
Most homes have at least one viable path. It’s slower and costs more than pre-line, but it’s rarely impossible
Pros and cons of wired PoE versus wireless-first
Wired PoE in favour:
- One cable carries power and data — no outlet needed at the camera or AP
- Reliable bandwidth that doesn’t degrade with neighbours’ Wi-Fi
- 4K cameras stream without competing for airtime
- No batteries, ever
- Centralised power means one UPS protects everything
Against:
- Higher upfront cost and real planning effort
- Disruptive to retrofit
- Device positions are fixed once the walls close
- More equipment to house and ventilate
The honest summary: wireless is easier and wired is better, and the gap widens with every camera you add
A pre-line checklist
- Confirm the ONT position with your fibre installer
- Mark the comms cupboard on the plan and check its depth, power and ventilation
- Mark every drop — APs, cameras, TVs, desks, outdoors
- Double up: two cables to every AP and camera position
- Choose your cable category and tell the installer early if it’s Cat6A
- Add up your PoE load and add 30%
- Order 20% more cable than the plan says
- Lay conduit with draw strings anywhere future runs are plausible
- Label both ends of every run as it’s pulled
- Photograph every wall before lining with a tape measure in shot
- Test every run before the plasterers arrive
Step 10 is the one people skip and later wish they hadn’t. Those photos tell you exactly where a cable sits behind finished GIB, years after everyone’s forgotten
FAQs
How many ethernet points does a new build need?
More than the device count suggests. A reasonable starting point is two per main room, two per TV wall, two per AP ceiling position and one per camera. Most people who wire a house say afterwards they should have run more.
Should I use Cat6 or Cat6A in a New Zealand home?
Cat6A if you’re pulling cable once and want it to last. It carries 10 gigabit over the full 100m where Cat6 manages roughly 55m. Cat6 is a reasonable budget choice for gigabit, but the cable is the part you can’t easily upgrade later.
Can I run my own data cabling or do I need an electrician?
Data cabling and electrical work are different categories, and anything touching mains needs a registered electrician. Confirm the current requirements before you start.
Where should the comms cupboard go?
As close to the ONT as practical, central to the house, with ventilation and power. A hallway or bedroom wardrobe usually works better than a garage steadier temperature, less dust, shorter runs.
How far can a PoE cable run?
The Ethernet limit is a 100m channel, roughly 90m of fixed cable plus patch leads. Beyond that you need fibre, a wireless bridge, or a switch positioned partway along.
Do cameras and access points need PoE+ or PoE++?
Most current APs and 4K cameras are comfortable on 802.3at PoE+. PoE++ matters for multi-radio APs, heated camera housings and door controllers. Check each device’s draw and size the switch’s total budget, not just the per-port rating.
Can I add ethernet after the house is lined?
Yes, usually. Ceiling voids and under-floor spaces are the common routes, with surface trunking, Ethernet extenders or a wireless bridge as fallbacks. It costs more and takes longer than pre-line, but it’s rarely a dead end.
 No products in the cart.